Disclosure: Nomadic Tendency is reader-supported. Links marked “Buy on Amazon” are affiliate links — we may earn a commission at no additional cost to you. We only recommend gear we have personally tested in the field.
Leveling a travel trailer is a five-minute job that new owners routinely turn into a forty-minute argument. It doesn’t need gadgets, apps, or an auto-leveling system. It needs a repeatable order of operations and one honest conversation with whoever is standing outside the truck window.
Here’s how to level a travel trailer, the exact system we run on our 33-footer at state parks within two hours of home and at boondocking sites with no pad at all. I’ll also tell you where the tech genuinely earns its money, because I like gadgets that work. I just refuse to pretend they’re required.
The short version:
- Walk the site before you back in. Pick your spot and note which side is low.
- Back in, stopping 3 to 4 feet short of your final position.
- Place ramps or blocks by the low-side tires.
- Back onto them while a spotter watches the bubble level, and slightly overshoot.
- Chock, let the trailer settle, and confirm level side to side.
- Unhitch, then level front to back with the tongue jack.
- Drop the stabilizers last. They stop wobble; they never lift.
That’s the whole skill. The rest of this article is the detail that makes it fast.
What You Need (Two Budgets, Both Valid)
The under-$50 kit: leveling ramps or a set of stacking blocks, a pair of wheel chocks, and a cheap bubble level stuck to the front of the trailer. This is our daily system. If you’re choosing between ramps and blocks for a heavier trailer, that decision matters more than anything else on this page, and we covered it in detail in our leveling blocks guide.
The tech add-on: a Bluetooth level like the LevelMatePRO that reads the trailer’s attitude from your phone in the truck cab. It replaces the spotter, not the process. More on when it’s worth it below.
I’m a fan of not blowing money on unnecessary gadgets. I’m also a tech nerd who happily pays for things that work and save real time when the budget allows. Both of those people agree on the list above.
Step by Step: How We Level Ours
1. Read the site before you commit
Pull up, get out, and look at where the trailer is going to sit. You’re checking two things: which side is low, and what the ground is made of. Grass and dirt eat narrow ramps; if that’s what you’re parking on, read the soft-ground section of the blocks guide before your trip, not during it.
2. Back in short, on purpose
Get the trailer lined up and stop 3 to 4 feet shy of where you want it to end up. This is the step most people skip, and it’s the one that makes everything else easy. With ramps, I stop about 4 feet short. With blocks or planks, 3 to 4 feet, because I want a moment to judge how much lift the low side needs before I build the stack.
3. Deploy ramps or blocks at the low-side tires
Ramps go snug against the tires, ramp face pointing at them. Blocks get built into a stack with a step, tall enough for the lift you estimated. On a tandem axle, remember both low-side tires need support. Get the stack width right and centered on where the tire will land.
4. Back on slowly, with a spotter on the bubble
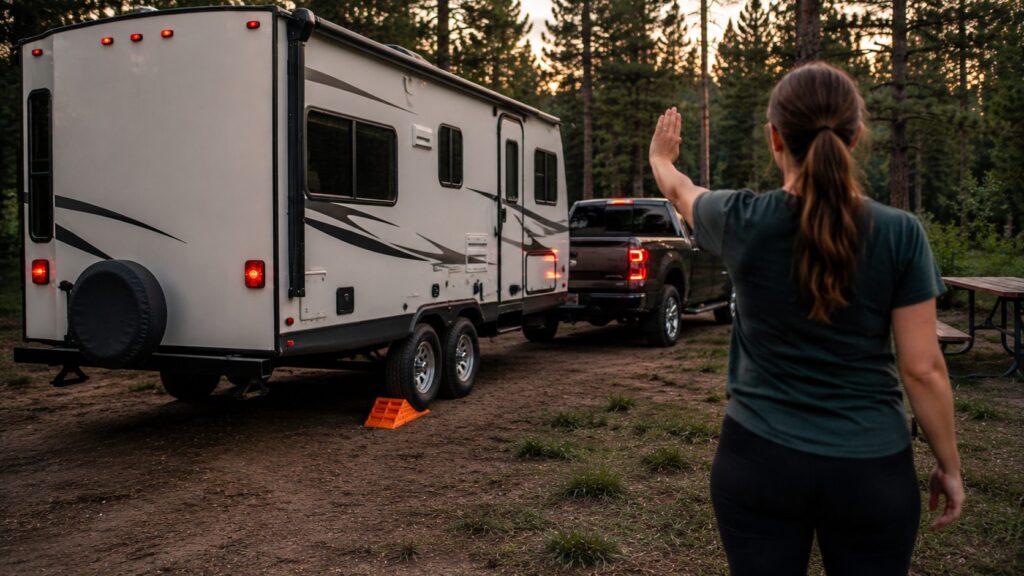
This is the family part of the operation. My wife, and now our daughter too, stands where she can see the bubble level on the trailer’s front and where I can see her. I back up at idle speed. She calls the stop.
Two details that make this work:
- Overshoot slightly. We stop just past level on purpose, because when you set the chocks and ease off the brakes, the trailer settles back into them and lands about right. Stop exactly at level and the settle leaves you a half-bubble low.
- On blocks, confirm the tire is centered. Your spotter’s second job is checking that the wheel parks in the middle of the stack, not hanging off an edge. A tire overhanging a block edge stresses the casing and the plastic both.
5. Chock, settle, verify
Set the chocks, ease off the brakes, and let the trailer take its final position. Now look at the bubble again. Close counts here only if it’s actually close: within about half a bubble. If it’s not, pull forward and adjust the stack. It stings for ninety seconds and saves the whole weekend.
6. Unhitch, then level front to back
Only now do you unhitch. Front-to-back leveling is the tongue jack’s whole job, and it’s the easy axis: crank until the bubble on the side of the trailer reads level. No blocks, no drama.
7. Stabilizers last, and only stabilizers
Drop the stabilizer jacks until they’re snug against the ground. Snug, not lifting. Stabilizers exist to stop the trailer from rocking while you walk around inside. The day you try to level with them is the day you learn what a bent scissor jack costs. If you take one sentence from this article to the campground, take that one.
The Bluetooth Question: When the Gadget Earns It
A Bluetooth leveler like the LevelMatePRO mounts inside the trailer, pairs with your phone, and shows you live side-to-side and front-to-back readings from the driver’s seat. The prep is identical to everything above. What it removes is the second human and the hand signals.
LevelMatePRO+ Wireless Vehicle Leveling System
LogicBlue Technology✓ Buy on Amazon
Live leveling readings on your phone from the driver’s seat, including exactly how many inches of lift each side needs. We have used the system, though it has not displaced the bubble and spotter on our own trailer.
Honest assessment: I’ve used the system, and it does what it promises. It is also genuinely optional. If you camp solo, back in after dark, or just want the numbers without the conversation, it’s worth the money. It tells you exactly how many inches of lift each side needs before you’ve left the driver’s seat, which turns block-stack guessing into arithmetic.
But don’t go into this thinking it’s a necessity for a quickly leveled camper. Our bubble-level-and-spotter system costs almost nothing, takes the same five minutes, and has the side benefit of teaching the next generation how a trailer actually works. The gadget is a convenience. The system is the skill.
Common Mistakes
Leveling with the stabilizers. Covered above, worth repeating. Lifting the frame with scissor jacks bends them and can twist their mounting points.
Chocking after unhitching. Chocks go on while you’re still hitched, before anything else. On a slope, the truck is the only thing holding 9,000 pounds in place until they’re set.
Skipping the settle. Reading the bubble the instant you stop, before the trailer has compressed into the chocks and the ground, gets you a reading that’s wrong by exactly the amount you’ll be annoyed by at bedtime.
Building a block stack too narrow. The tire needs full contact. Half-on is how blocks warp and casings get damaged, especially under heavier trailers.
Trusting the fridge shelf as your level reference. Calibrate once: park somewhere truly flat, check that your stick-on bubbles agree with a proper level on the trailer floor, and adjust the bubbles. Every reading after that is only as good as that calibration.
FAQ
Do you level a travel trailer before or after unhitching?
Before, for the side-to-side axis. Level side to side with ramps or blocks while still hitched, then chock the wheels, then unhitch. Front-to-back leveling comes after unhitching, using the tongue jack. Stabilizers come down last and are never used for leveling.
How do you level a camper without a leveling system?
A bubble level, ramps or blocks, and a spotter. Back in a few feet short of your final spot, place ramps at the low-side tires, and back on slowly while the spotter watches the bubble and calls the stop. Chock, let it settle, unhitch, and finish front to back with the tongue jack.
Is a Bluetooth RV level worth it?
It’s a convenience, not a requirement. A device like the LevelMatePRO shows live readings on your phone, which replaces the spotter and tells you the exact lift needed at each wheel. Worth the money for solo campers and frequent movers. Skip it if a helper and a $5 bubble get you level in five minutes, because they can.
The Bottom Line
Level side to side on ramps or blocks, chock, settle, unhitch, tongue jack, stabilizers. Two people and fifty dollars of plastic do this in five minutes at every site we visit, and the person calling the bubble these days is sometimes twelve. Add the Bluetooth level when the budget says yes and the convenience is worth it to you. Skip it guilt-free when it isn’t. Either way, the skill rides along for free.
Related: Best RV Leveling Blocks · Boondocking for Beginners · Best Power Stations for Dispersed Camping